Crazy Shortcut Quilts is a book that my daughter and I wrote about fat quarter crazy quilts finished with a quilt-as-you-go technique that uses the decorative stitches of your sewing machine to do the quilting! It's gorgeous and so easy! I have a new blog at http://www.crazyshortcutquilts.com/margueritas-blog/ - - please come visit me there! Marguerita McManus, Seward, Alaska, USA
Here's a scan from the Keepsake Quilting Catalog showing our book! Take a look at the "Going Mod" fabrics on the opposite page - aren't they great! They would make a great crazy shortcut quilt.
Guess the first thing Sarah said when she saw the catalog......"I see they chose MY quilt to feature on the open page" with a very big grin :)
Well, the old 8 foot pool table is *GONE*! I can hardly believe it. Sometimes I go downstairs just to check that it really is gone! The pool room is cleaned up and clear of clutter, with new barstools - nice! Tom is going to build a small table to complement the barstools - we have the design all worked out but we need to wait for the logs to thaw for milling.
Tom had to completely knock out all of the stairs to get the slate out of the basement and when he put them back in he reinforced the treads from the underside. Then I started cleaning, sanding and priming. There used to be a closet door on the tall side (he took it off, frame and all) and the angled side used to be closed in with plywood, making the enclosed space virtually useless.
We are going to store all the canning supplies (about 12 cases of jars) way in the back, on rollers so they can be pulled out easily, and then Tom's going to build some shelving. I'd like a small office area, just for typical desk clutter. He is happy just to get the jars out of the way!
I learn so much on the internet, and the tutorial and tips from Holly Knott really helped me a lot. I modified some of her hints, using things I had at home and I continue to work on my quilt photography skills every time I take a pic.
For the book I flew to Wisconsin to work with the staff photographers at Krause and what an experience! Those photographers must have had several hundreds of thousandsof dollars in equipment, excellent professional training and the creative nature to do so many photos justice. I was in awe.
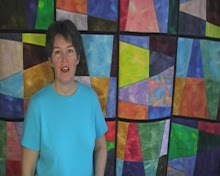
Because I wanted to submit a few of my own photos for the book I tried to learn as much as possible. So, here's a little tour of my quiltroom/bunny room/photography studio.
The wall has a piece of rough textured fleece stapled to it; there's a photography grey card pinned to that and all I usually do (for small scale photos - not full sized bed quilts) is smooth the fabric onto the fleece, or put it on with 3-4 pins. The poles that you see are from a rolling closet rack purchased at WalMart for about $11. I like this a lot because I can use it for storage too, when it's not being used for lighting. Suspended from the ceiling are 2 cheap florescent lamp fixtures with daylight rated bulbs. Clamped to the rolling closet rack are 2 cheap clamp lamps with expensive daylight rated florescent bulbs. All this is connected to a power strip with an on/off switch so it's only turned on right when I take a photo.
When I'm done with the pic, I unplug the clamp lamps and drape their cords over the top of the rack (remember, this is also the bunny room and bunnies chew cords) and roll it aside. You can see my Quilting Table in there too. The bins against the wall store my threads and the shelves on the wall have a few scrap bins.
Here's an older top that I did using Dina Pappas's method of fusing the fabric squares to a lightweight gridded stabilizer. She loves florals so that's what we all (in her class) used.
I don't love florals that much, so I tried Dina's technique in batiks. This is still a pretty quilt and made even better with the addition of the two great borders (Sarah's work again - what a great kid!)
Watercolor quilts are usually made from floral fabrics, but I hate florals, so I used batiks. My friend, Dina Pappas, wrote a book about making watercolor quilts using a foundation stabilizer with gridded lines on it. I used her technique to make these quilts and what a breeze!! Even MY seams are straight - and that's saying something!
I also hate doing borders so my daughter Sarah Raffuse put the fantastic borders on the quilts for me - now I just need to quilt them. What do you think about the batik v. floral?
Our book, Crazy Shortcut Quilts, is in the Keepsake Quilting Catalog!!!!! Yahooooooooo!!!!!!!! I LOVE those guys! They also bought my very first pattern years ago.
Well, this one is a draw. After 2 days together they are getting used to each other, and seeing the benefits of friendship. Audrey realizes that if she doesn't reach too fast, she gets to pet the bunny and bunny (not so dumb) quickly figured out who was leaving him small tokens of affection on the floor, like Corn Flakes and globs of banana. Hehehehe. He found them before I did!
So now he warily follows her around, at a safe distance, and she thinks she just added one more admirer to her posse. Happy Days for all of us!
When I picked up Audrey in Girdwood today (Sarah and I meet aprox. half way between Seward and Anchorage) I asked Sarah for her advice on fabrics for bindings for both the purple scraps quilt and the reproductions quilt. We talked for a few minutes and I agreed with her choice of a white-on-white for the reproductions, and then I commented that I would hopefully have it finished this weekend. Her laughter was loud and long, and I was slightly offended. Her thought was that if I thought that Audrey would leave me with energy or time to quilt, I was indeed, nuts. And she said so, out loud, between laughs.
I hate admitting that I am wrong, but at 10pm tonight (I drove away with Audrey at noonish) I believe that she may be right. How I managed to raise a child and her cousins being a single parent, I just can't remember. I am exhausted. And bunny just came out of hiding.
Audrey finally fell asleep at 9:30 and the only nap she had was on the drive back to Seward. It was a gorgeous day! We had a fun drive and stopped at the property on the way home to feed the "free" bunnies - and I noticed for the second time that the eagles must have gotten one of the little ones.
At home, Audrey immediately sought out bunny, and found him in his usual spot, in our bedroom (he has his own room, which doubles as my quilting room). She stayed about 4 feet from him, and they had a staredown. She did her dance and he glared, giving me "the look".
If you are a pet owner, you know "the look". It's what you get when you take them to the vet for shots or bring and infant into the home. The "why are you subjecting me to this torture?" look.
They left each other alone for about 4 hours and then had the showdown in the kitchen. Bunny came out to assert himself and he backed Audrey all the way up to the kitchen cabinets, where she squeeled and clung to my leg. Then she took action. When he got close enough (overconfident bunny!) she reached down like lightning and touched him on the back!! Whoooooooooeeeeee! He took off, halfway down the hall, and then stood his ground (they don't call them dumb bunnies for nothing). She just toddled on over and did it again! Off he ran, to hide behind the bed, and Ding! Audrey is the winner of round three!
Gramma's gonna collapse and re-prioritize her quilting and move a few deadlines back (don't tell anyone!).
My daughter, Sarah Raffuse, my best friend Penny Herndon, and I all went to Quilt Market in Houston and I came away with these fabrics! I bought quite a variety! The Earthtones are P & B Textiles.
The dark chocolate and periwinkle blue are In the Beginning fabrics, called Bohemian Manor.
The milk chocolate and powder blues are Marcus Brothers
the stack of autumn colors are RJR;
the muted tonals with the rose is Transitions by Benartex.
The two photos of Kings Road Fat Quarter Packs (there are 4 of them) are the exact same fat quarter packets, just reversed. On one side of the bundle you see 4 fabrics and on the other side (I just flipped them over in the same order when photographing) you see the other 4 FQ's in the bundle.
I love scraps and save every sliver - I even save the ends of my decorative threads! I randomly pieced these scraps together and ended up with 4 squares. Check out the stitching - I am happy with it. I need to get it sashed and bound this week.
I put together a few mismatched fabrics, and an awesomely overpowering purple flecked with silver, just to see what would happen. I might make a purse out of the squares.
This little quilt is a favorite! I love black and white quilts and wanted to throw some really bright fabrics in it, just for fun. For extra special fun I am using my extensive collection of 12wt cotton Sulky threads. I couldn't be happier if it were quilting itself! I can't wait to see what my granddaughter Audrey thinks of the colors :)
I've quilted on them all. Only thing I haven't done is hand quilting. I started on the Kenmore and couldn't make nice feathers on it, bought a Bernina & loved quilting small quilts on it and then sold the Bernina to help finance the Gammill Classic Longarm. I quilted professionally for several years, averaging about 4-6 quilts a month (I was working full time and a single parent of a teenager!). I got really tired of how big the longarm was and sold it. I bought a Nolting midarm machine and a Hinterberg Stretch frame and I found happiness.
I have written a much longer article on Squidoo about machine quilting - click here to read it.
I was inspired to do some traditional quilting when I quilted for Dina Pappas as she was writing her first of 3 books. I did the feathers on the border of one of her bigger quilts and loved every minute of it!
However it was Trish Stewart who made me "quilt out of the box" by giving me tops (hiring me as a longarmer) and saying "do something wildly creative and spectacular". I panicked. I procrastinated. I thought about giving the tops back and saying "I just can't do it" but you know what? I don't like to admit defeat. As I was pacing my studio at the time (I've moved & sold the longarm) I came upon a pile of top stitching threads that I'd always wanted to use and never had (this is in the days before Sulky's 12wt - which I just *LOVE*). I grabbed them and threaded the machine before I could chicken out and just started. The first step of any endeavor is the hardest. And I lived 125 miles from Trish - there was no "come on over and see and if you don't like it I can un-quilt it". No, this was commitment and it's most committed.
She loved them and we went on to collaborate on quilts for years until she moved to Texas due to her husband's health. Here are a few of my favorites. Check out the hummingbird on the peachy colored quilt.
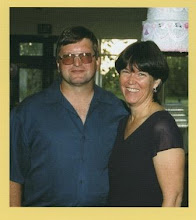
Here are some pics of bunny (yep, that's the best we can do for a name - LOL). The one with Tom is just days after bunny came to live with us, and the other one is with my old girl bunny Pooh, who has crossed over the bunny rainbow bridge.
We've had so many bunnies that I don't name them anymore, and even when they did have names, they ended up being called nicknames. I know, you are saying "who would live with a rabbit in their house?" and then do it again?!? We are kinda silly. And don't just fall in love and go get one, they can be a real problem - like when they chew the cord to your sewing machine foot and you can't sew or quilt until it's repaired.
Audrey stayed overnight at gramma's house and we both had so much fun! She played a full day of "keep gramma running from room to room" and she had a great round of air-sparring with bunny.
Audrey's idea of fun was to run to wherever the bunny was, every 3 minutes, hollering out "bunny" at the top of her lungs. When she located bunny (who has only 3 or 4 hiding places and isn't used to being searched out) she would do her "bunny dance". This consists of hopping from foot to foot while pointing at bunny and hollering "BUNNY!" and laughing.
After about 5 hours, bunny decided to take action. He advanced on her by a foot! Ohhhhh, did she squeal! And she backed up exactly 1 foot. Hehehehehe, betcha you can see where this is going. Bunny backed her up, through the hallway, the kitchen and into the living room - 12 inches at a time. I about peed my pants laughing so hard. Bunny advance - Audrey squeal - Audrey dance backwards 1 foot - repeat.
But wait, you don't think bunny won do you? She won round 2 when he went back to his room, thinking himself victorious and parked in his favorite spot - the doorway. She danced down that hallway and touched him on the nose!
Ha ha ha ha ha! Bunny jumped a foot into the air and took off to hide behind the bed! Ding. Round three is the weekend of January 19th when Audrey comes back for another weekend. Let's see who wins this time!
I read about this bag and saw a photo posted to the website for Stashbusters at Yahoo! I wanted it immediately. I ordered it from Quilterswarehouse through a link on the designer's page Four Corners Designs.
I just love this pattern. I put it together in a few hours, modifying the size (down) to a small purse size instead of the tote bag size in the pattern. The pattern gives specific directions for creating it from 3 types of materials (fabrics, denim and quilted fabrics) which I thought was very cool and the instructions were understandable, with good diagrams.
I chose to make my first one from a tapestry fabric and a cotton print but my next ones will be of our own crazy shortcut quilting technique. I already have a few squares prepared but I wanted to test-drive the pattern first before using up my quilted squares.
I also love to travel the rest of the states. I grew up in new england and have taken train trips from Florida to Connecticut, and from New York City to San Francisco to San Diego & L.A. and back to N.Y.C. via Kansas and Missouri.
I've flown into Detroit and driven to Oshkosh and flown into St. Paul and driven to Oshkosh. I flown into and explored Kansas City (twice)(both of them), Portland, Oregon (twice so far), Houston, Texas (three times so far), Las Vegas, Nevada (can't remember how many times!), Los Angeles, California and Honolulu, Hawai'i. Wherever I go I usually rent a car or ride the bus and explore, explore, explore! And then there's the two trips up/down the AlCan Highway between Seward, Alaska and Arizona. Hehehehe. More travel than I had thought...
In 2000 I moved to Seward, after living in Anchorage since 1978. What a change! When I came to Anchorage at the end of the pipeline construction phase the population was just at 100,000 and dropping. After living in an east coast city of millions, it was a refreshing change.
By 2000 the population was close to 225,000 and getting too crowded for me. I had spent from 1990 to 2000 traveling around Alaska, looking for where I'd like to live and enjoying the rest of the state. I'll write about the places I've visited, from Fairbanks in the north to Ketchikan in the south, from Crooked Creek in the west to McCarthy in the east, the roads I've driven, ferries I've taken, ports of call and bush flights, and also the places we've fished on the F/V Dolly B. This gal's been around.
I love taking photos around Alaska. Here are some of my favorite fishing pictures (and a black bear pic) - I hope you enjoy them as much as I do! The black bear is in the woods inside Nuka Bay, the 2 men on the bridge of the F/V Dolly B are Tom and his brother Steve the bay photo shows the Dolly B with her net out in a set in Resurrection Bay with the city of Seward, Alaska in the background and the up close photos shows the Dolly B anchored with the jitney in Resurrection Bay, Alaska.
Hurray! We have a new to us (used) 9 foot pool table in the basement and the basement floor is cleared of clutter allowing us room to play! How cool is that?! This has been a year (plus) long endeavor and we still have to get the parts of the 8' table out of the basement - no mean feat in itself.
Tom did an absolutely awesome job of leveling and smoothing the table and together we stretched the cloth. It is sweet!
Now the chore is clearing out under the stairs to the basement, knocking out the stairs, suspending the winch from the roof rafters and winching up the single sheet of 4' by 8' (1" thick) slate without breaking it. Then we have to lift (no winching) the base of the table up and out of the basement - all in 1 piece. The ball return is built into the base and there's no taking this baby apart. She went into the basement as a single unit and will come out the same way, about 30 years later. Tom and his brother Steve grew up in the house and learned to play pool on this table.
I don't have the room or the money for a huge expensive sewing cabinet, and being the innovative person that I am, I created my own design for a sewing table and because I work hard at my craft, I call it my Quilting Desk.
I started with 2 relatively inexpensive folding tables from SAM'S Club ($42 each in Anchorage, Alaska) that measure 2' wide x 4' long, some rigid foam insulation and clear vinyl - 54" wide and on a roll, in the fabric section of WalMart (JoAnn's probably has it too) $2-3 per yard. I use 2 tables because I quilt large quilts and I cannot have any drag on the fabrics as I am quilting them - I need a perfectly flat surface for several feet, all around the sewing machine.
After setting the height of the tables to just clear the tops of my thighs as I sit in my most comfortable chair at the table, I put my sewing machine on the table top and measured the height from the top of the table to the top of the stitch plate. It measured at 3½" and I purchased 2 pieces of rigid foam insulation - 1 piece of 2" thick x 8' long x 2' wide and 1 piece 0f 1½" thick x 8' long x 2' wide.
I cut the length of each piece in half, to make 4' sections, and then lay each 2" x 4' onto each table, then put the 1½" x 4' sections on top. Then I made the cut out for the sewing machine to fit in. I set the sewing machine on top of the foam insulation and positioned it as far away from me as I could comfortably sew and quilt. I like a lot of support space in front of the needle, to support a heavy quilt as I am quilting it.
I used a pen to mark a space around the sewing machine and set the machine aside. Using a serrated knife to cut the foam, I cut out the space for the sewing machine from both layers of foam. I started with a cut to just fit the sewing machine, but then went back and made it bigger because I wanted space to access the front loading bobbin area easily. I then made 1 straight cut through the top layer of foam only, to create even easier access to the bobbin. When I need to change bobbins, I just slid this piece out a few inches, giving my hand access to the bobbin area.
Lastly, I lay the clear vinyl over the top of the foam and around the sewing machine. This vinyl is so slick that everything including heavy quilts just glides right over it - sweeter than sweet! I put it in place and then cut out an area just larger than the feed dogs, and taped all 4 sides of the cut opening to the sewing machine. Because I have bad eyes and am a poor ¼" seamstress, I put a strip of black electrical tape (you can use masking tape or anything else you want) to mark the ¼" edge for quilting.
For inspiration and for fun, I slide photos, magazine pages and quilt patterns under the clear vinyl so that I don't always have to look at the blue foam. In the photo you can see that I also use the table top for my pressing surface (try not to notice how dirty my pressing pad is!).
In about an hour I had a custom Quilting Desk that is completely portable and stores easily. The tables have folding legs and they can fit in a closet and so can the blue foam insulation. Updated photos here.... This video shows the basics ...
This video shows how I convert the set up to support big quilts for machine quilting .....
I came into some money in 1995 or so, and bought a used 1630. What a dream! That machine was superb at free motion and I am convinced to this day it is because of the vertical bobbin. I perfected my free motion feathers and started teaching free motion quilting and designing my own quilting patterns. I quilted for Dina Pappas, and had my quilting acknowledged in her first book, Quick Watercolor Quilts!
I sold the 1630 to buy a longarm quilting machine and have since sold that and bought a mid-arm machine and 2 Bernina 180's. The Bernina's do the decorative stitch quilting in our book, Crazy Shortcut Quilts (Krause 2007). I borrowed one from my daughter Sarah and bought one from Dina when we thought that the electronics were toasted on Sarah's machine. Seams Like Home Quilt Shoppe fixed her up and now both are humming right along!
I started sewing maternity clothes for myself in 1981 and baby clothes for Sarah in 1982. I made my first quilt for Jontie Hall in 1981. The old machine was tucked away for many years and I pulled it out again to take some quilting classes in the early 1990's. My teacher constantly ridiculed any machine that was not a Bernina (me and 1 or 2 others in class) and I resent it to this day. I could not afford another machine and stuck by the Kenmore, making modifications and sacrificing quality but doing my best. I was trying to learn piecing, machine quilting and heirloom machine quilting (feathers) and then ribbon bobbin work. There are some things that the Kenmore did (and still does) exceptionally well, and some that it just doesn't - free motion and bobbin work. It is my work horse and it is still set up for piecing and some decorative stitch quilting.
I am sashing the squares to a reproduction quilt that was made by a group of quilters. The fabrics are by Chainteclaire and designed by Darlene Zimmerman. The squares were randomly cut by the ladies at Seams Like Home Quilt Shoppe in Anchorage, Alaska (http://www.seamslikehome.com) and machine quilted by them in part and finished by me. It's gorgeous!
We are stripping out an old vinyl kitchen floor. By hand. Inch by inch, layer by layer, using chisels and a 2" metal scraper, on our hands & knees. The vinyl is anywhere on the older side of 25 years and is so worn that it only comes off in layers - I'll post some photos this week. The top layer, a dirty lime green and dirty white pattern, comes off in brittle chips some of the time but sometimes we can get a whole 4"x6" chunk and then we celebrate! Under that is the glue that adhered the surface layer to it's composite backing, and this comes up in ribbons when it's wet - I'll get to the wet part soon.
Under that is a 1/8" layer of some type of composite backing and under that is the glue layer and then plywood. The top brittle layer chips off easily even if it is in small bits but the underlayers are a nightmare. I've learned that soaking them helps. We layer small sections of old rag towels, about 2' square, onto the exposed underlayer and pour boiling water on the towels and let them sit and soak for about 1/2 hour. Then we begin scraping. I can scrape away about a 2' square section in an hour, and I can only do about an hour a day, every other day. My arms, back and my scraping hand hurt afterwards so I give them a rest.
Sweetpea Pods Sew Along
-
Join us for our upcoming sew along! We’re making Sweetpea Pods starting on
Tuesday, August 22. You can join in at anytime! When you sign up for the
sew alo...
The Cutest Pincushion
-
Debbie Shore of Thimblane shows how to make this adorable mannequin pin
cushion. Watch more of Debbie’s videos on her YouTube Channel.
Improvising New Stitches
-
Perhaps I'm a little OCD but I get really annoyed at stitches that only go
to one side when I am centered on my seam line. For example #78 & #80
below- the...
Everything on this blog including it's archives and photos is copyright 2007-2009 to Marguerita M. McManus. Please do not copy or reproduce any portion of it without written permission.